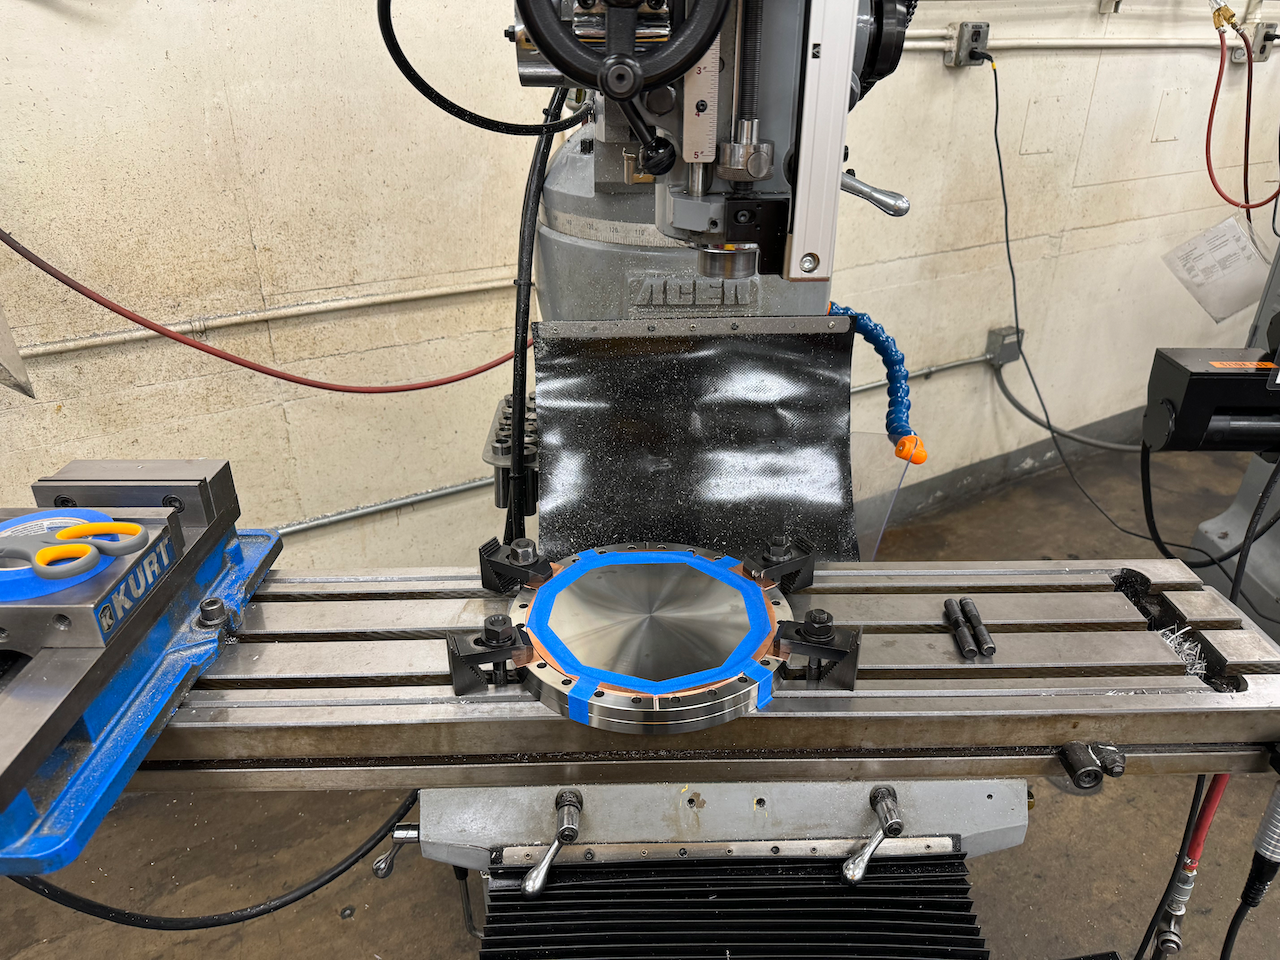
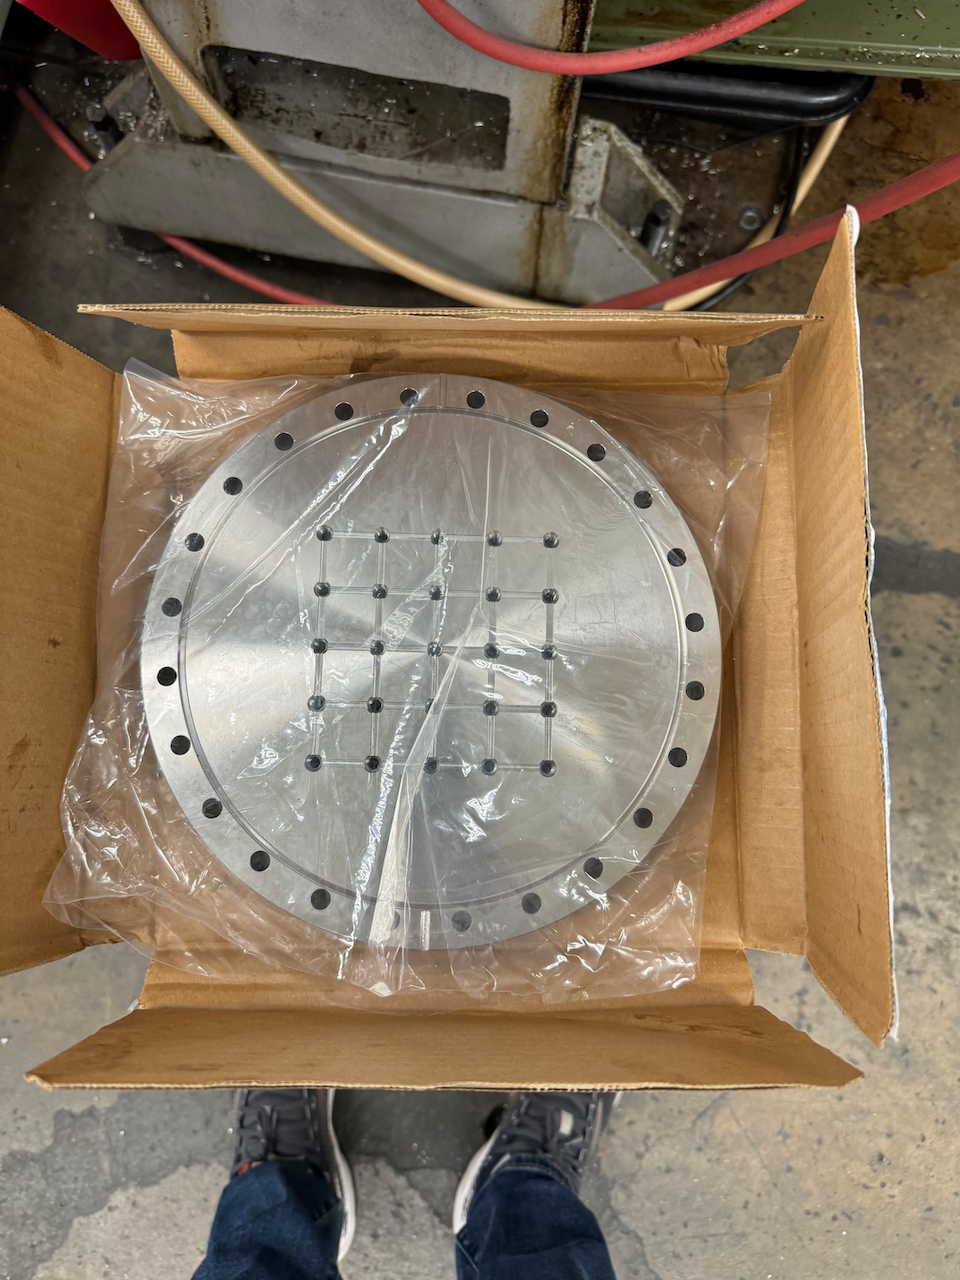
I machined 25 1/4-20 holes into a Kurt J Lesker F1000X000N, 10" diameter 304 Stainless Blank Flange. I added a 0.020" deep channel between the holes so that screws and posts wouldn't create virtual leaks if placed on top of one.
See attached photos and drawing.
Here is a list of instructions, some of which may only make sense to me:
Put flange on mill
Tape copper gasket at 45°, 135°, 225°, and 315° to secure it
Tape around copper gasket
Secure flange with 4 “stairs” with copper under the piece
Use 5/16 or 19/64 pieces to align leak checker gaps vertically
To do this, put 5/16 or 19/64 pieces holes and press against the rails
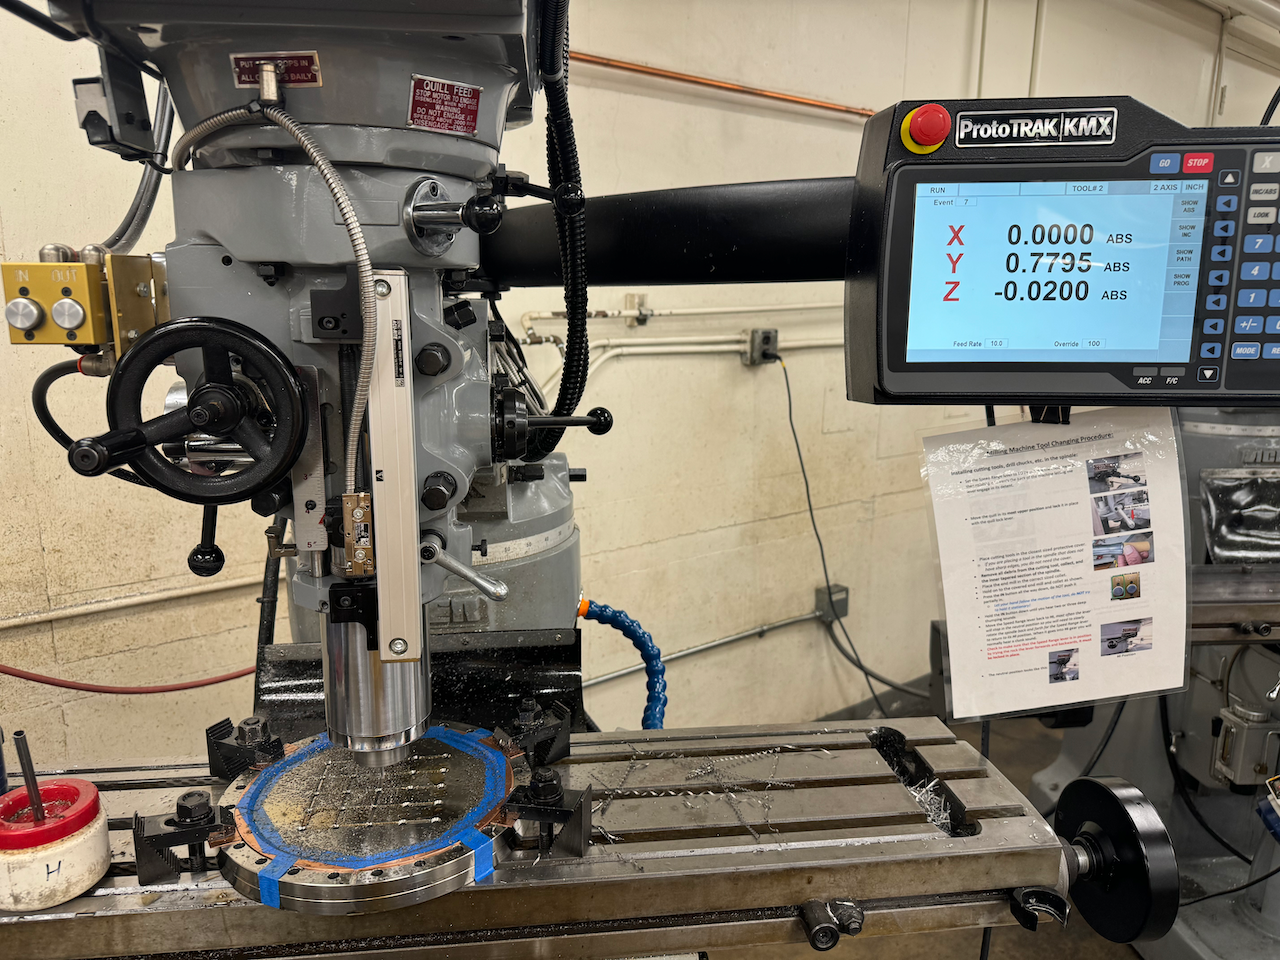
Finder center with edge finder
Program hole pattern
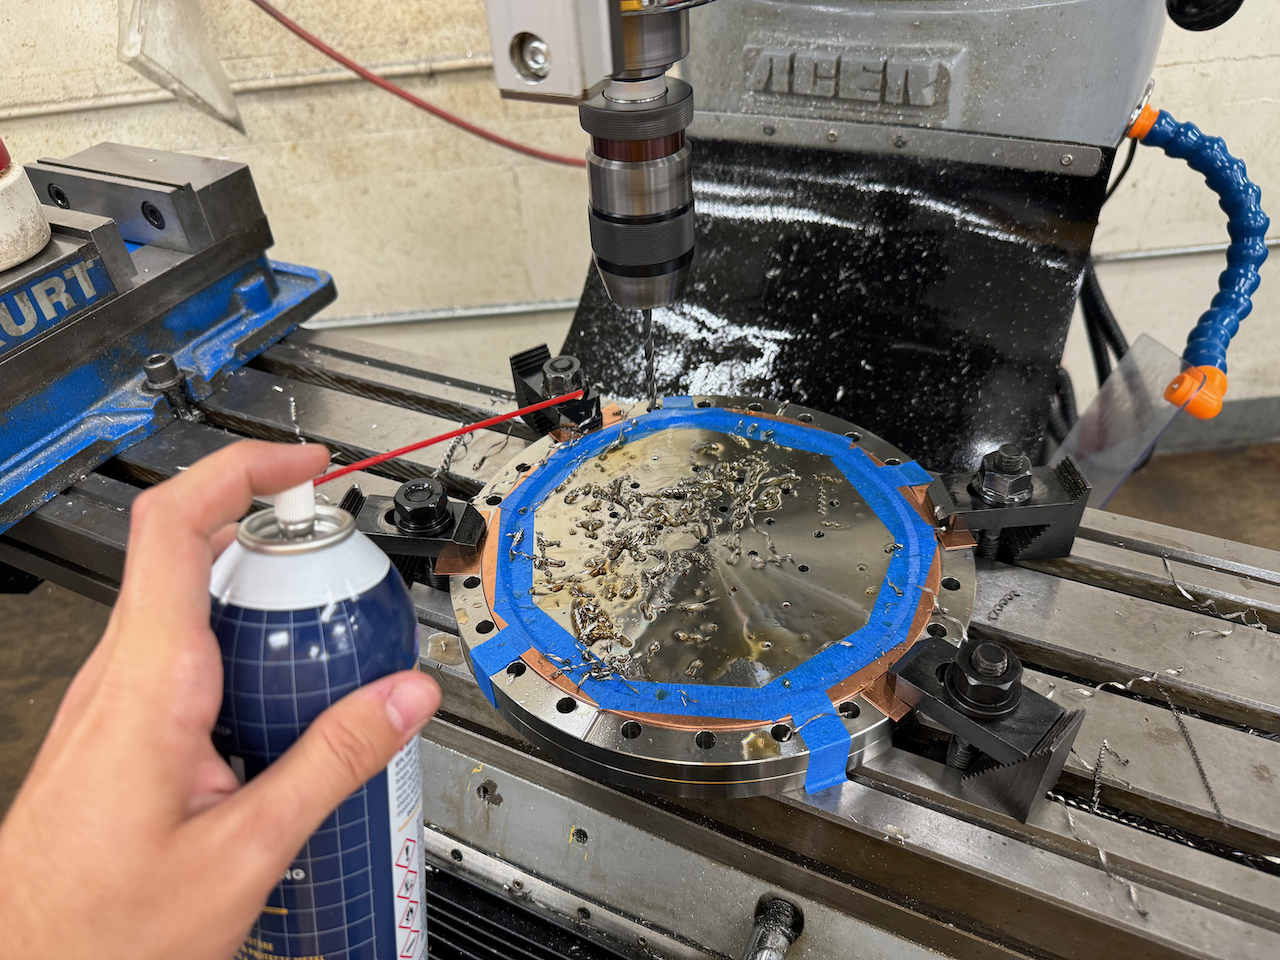
Use center drill to do hole pattern, going into the “2nd layer”
Use drill stop to do this
200 rpm on low speed and in reverse
Use #7 drill (.201 diameter) very tightly in chuck
Put in hole, use drill stop, raise drill, raise table 500 thou
Drill pattern using spray bottle lubricant
*use lots of pressure* and
700 rpm on high speed, forward
Use 4 flute, 90° chamfer tool
Put in hole, use drill stop, raise drill, raise table 50-65 thou
Chamfer using spray bottle lubricant
200 rpm on low speed, reverse
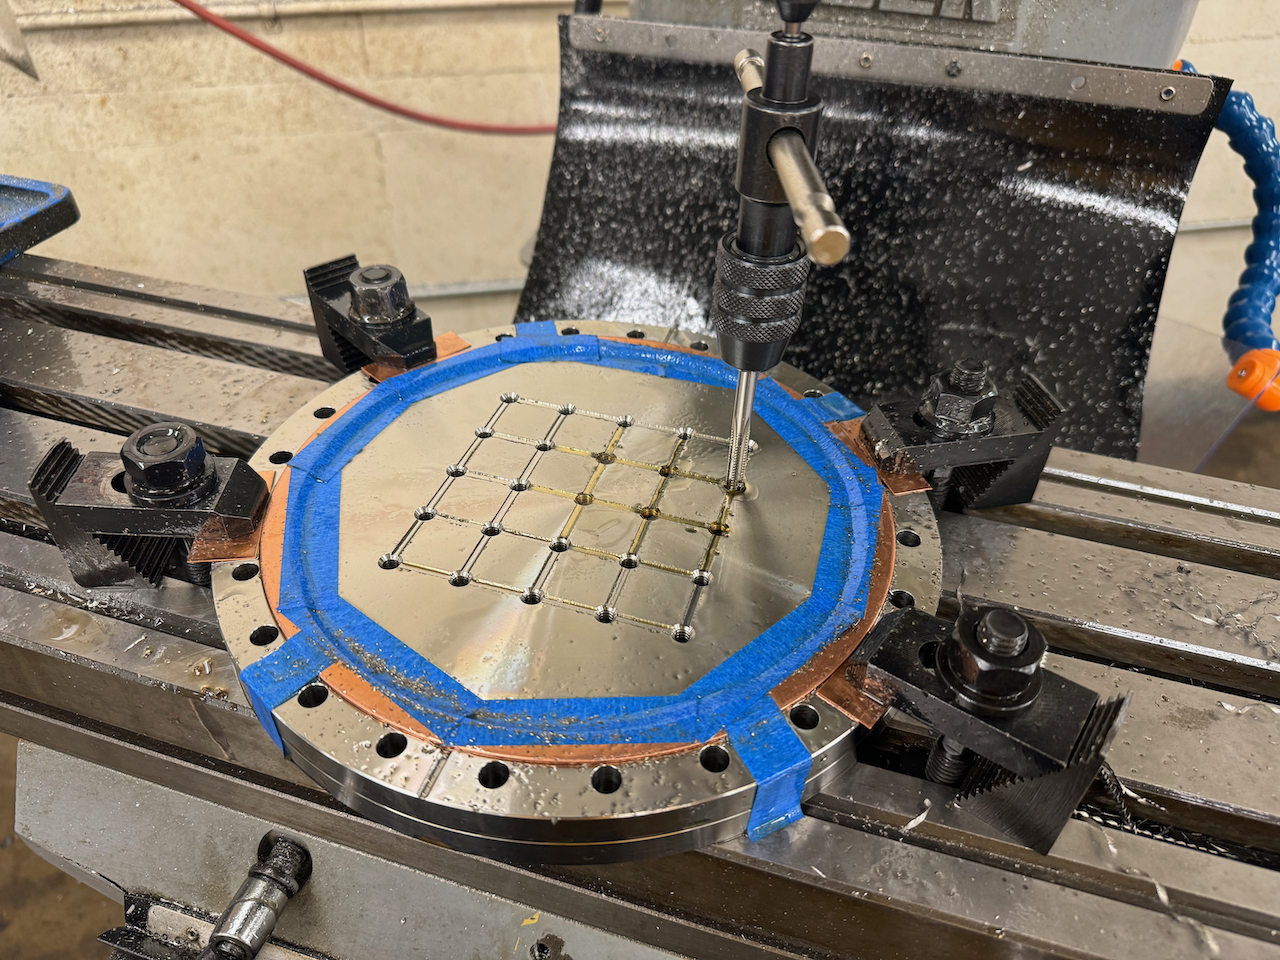
Program end mill pattern
*be sure to constantly raise and lower height*
Put 1/8 in diameter, 4 flute tungsten carbide end mill in, find 0 z by putting end mill over hole, barely taking anything
Then lower by 0.020” for channel
4000 rpm on high speed, forward
10”/min
Use initial (p) tap to get first pattern
Use bottom tap to clean up holes
Should get 14 half revisions out
This gives around .4” of depth
Carefully chase holes with bolts to clean up the thread
Use stone to remove burrs from end mill
Clean machining lubricant off flange