[Jeff, Ian, Daniel]
Ian and I machined out 1/4-20 holes in the Thorlabs MB1824 aluminum breadboard into 0.266" diameter through holes for 1/4 screws so that we can put screws into the blind holes on the Ideal Vacuum base plates. We used the drill press where we could and a drill otherwise for holes too close to the center of the breadboard. I accidentally flipped the orientation of the holes, so I am currently building the mirror image of my SolidWorks design. I don't think this will be an issue. If it is, we can machine more holes into the MB1824 breadboard.
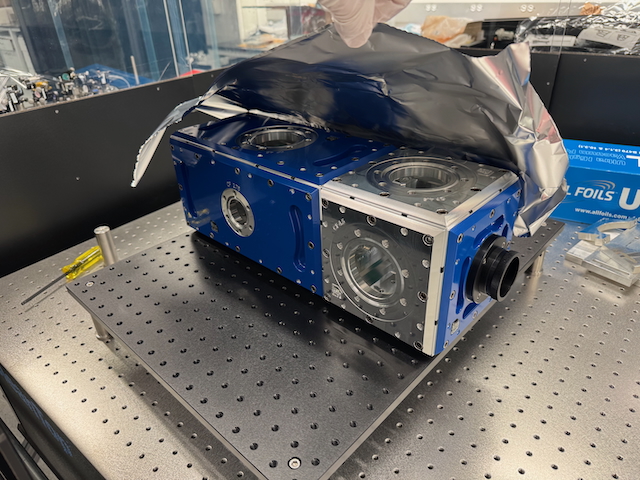
Jeff and I cleaned with isopropanol wipes and attached the two ideal vacuum "cubes" following these steps. We put the "high pressure side" away from the MOT because I figured it would be easiest to screw in parts there. The cubes were flush together, but the cube was oriented a bit clockwise when looking down from the cube to the prism.
We then attached the sides to the cube/prism assembly. For the 6"x6" plate to 2" diameter window, we cleaned and dropped in one viton gasket but couldn't fit a second gasket between the window (which we cleaned with puffs of clean air) and the "screw", partially because the mirror is too thick, partially because the viton is too wide when it's on the "screw". I tightened the "screw" finger tight. This can't be good for the window, but the edge of the window can't be used anyway. The "screw" sticks out approximately 0.75-0.76" for all 3 we assembled.
For tightening the plates to the cube/prism assembly, I did a few turns by finger to get the screws in, then used a screw driver until I encountered some resistance, then did a bit more on the screwdriver, before finishing with the torque wrench at 50 in lbs (5.7 Nm) and then 70 in lbs (7.9 Nm) twice, following these instructions. A torque wrench that can be set lower (like this) and corresponding hex bit socket set, if needed, (like this) could be useful. I used a lot of isopropanol wipes since the cleanliness of the parts is suspect. Hopefully everything is sufficiently clean.
Lastly, Jeff and I mounted the prism/cube assembly to the breadboard with some 3/4" long 1/4-20 screws and washers.
Next, I am going to attach parts to the CF flanges on the ideal vacuum plates. I am not sure which viton gasket I should use. (1 or 2)